Introduction
Blush is one of the most powerful makeup products for enhancing facial structure and adding a natural, healthy glow. However, applying blush without considering your face shape can sometimes lead to an unbalanced or unintended look. Understanding best blush placement for different face shapes helps you highlight your features, create symmetry, and achieve a more sculpted appearance without heavy contouring.
This guide explains how to place blush according to different face shapes, along with techniques, mistakes to avoid, and simple tips for a naturally lifted look.
Why Blush Placement Matters
Blush is not just about adding color to the cheeks. Its placement can change how your face shape appears. Proper positioning can:
- Lift sagging features visually
- Slim or widen certain areas of the face
- Add balance to asymmetrical features
- Create a youthful, healthy glow
Incorrect placement, on the other hand, can make the face look wider, flatter, or droopy depending on application style.
Understanding Your Face Shape
Before applying blush correctly, it is important to identify your face shape. The most common face shapes include:
- Round face
- Oval face
- Square face
- Heart-shaped face
- Long or oblong face
- Diamond face
Each shape has different proportions, and blush placement should complement those natural lines.
Best Blush Placement for Different Face Shapes
1. Round Face
A round face has soft angles and similar width and length. The goal is to create a slimming and lifting effect.
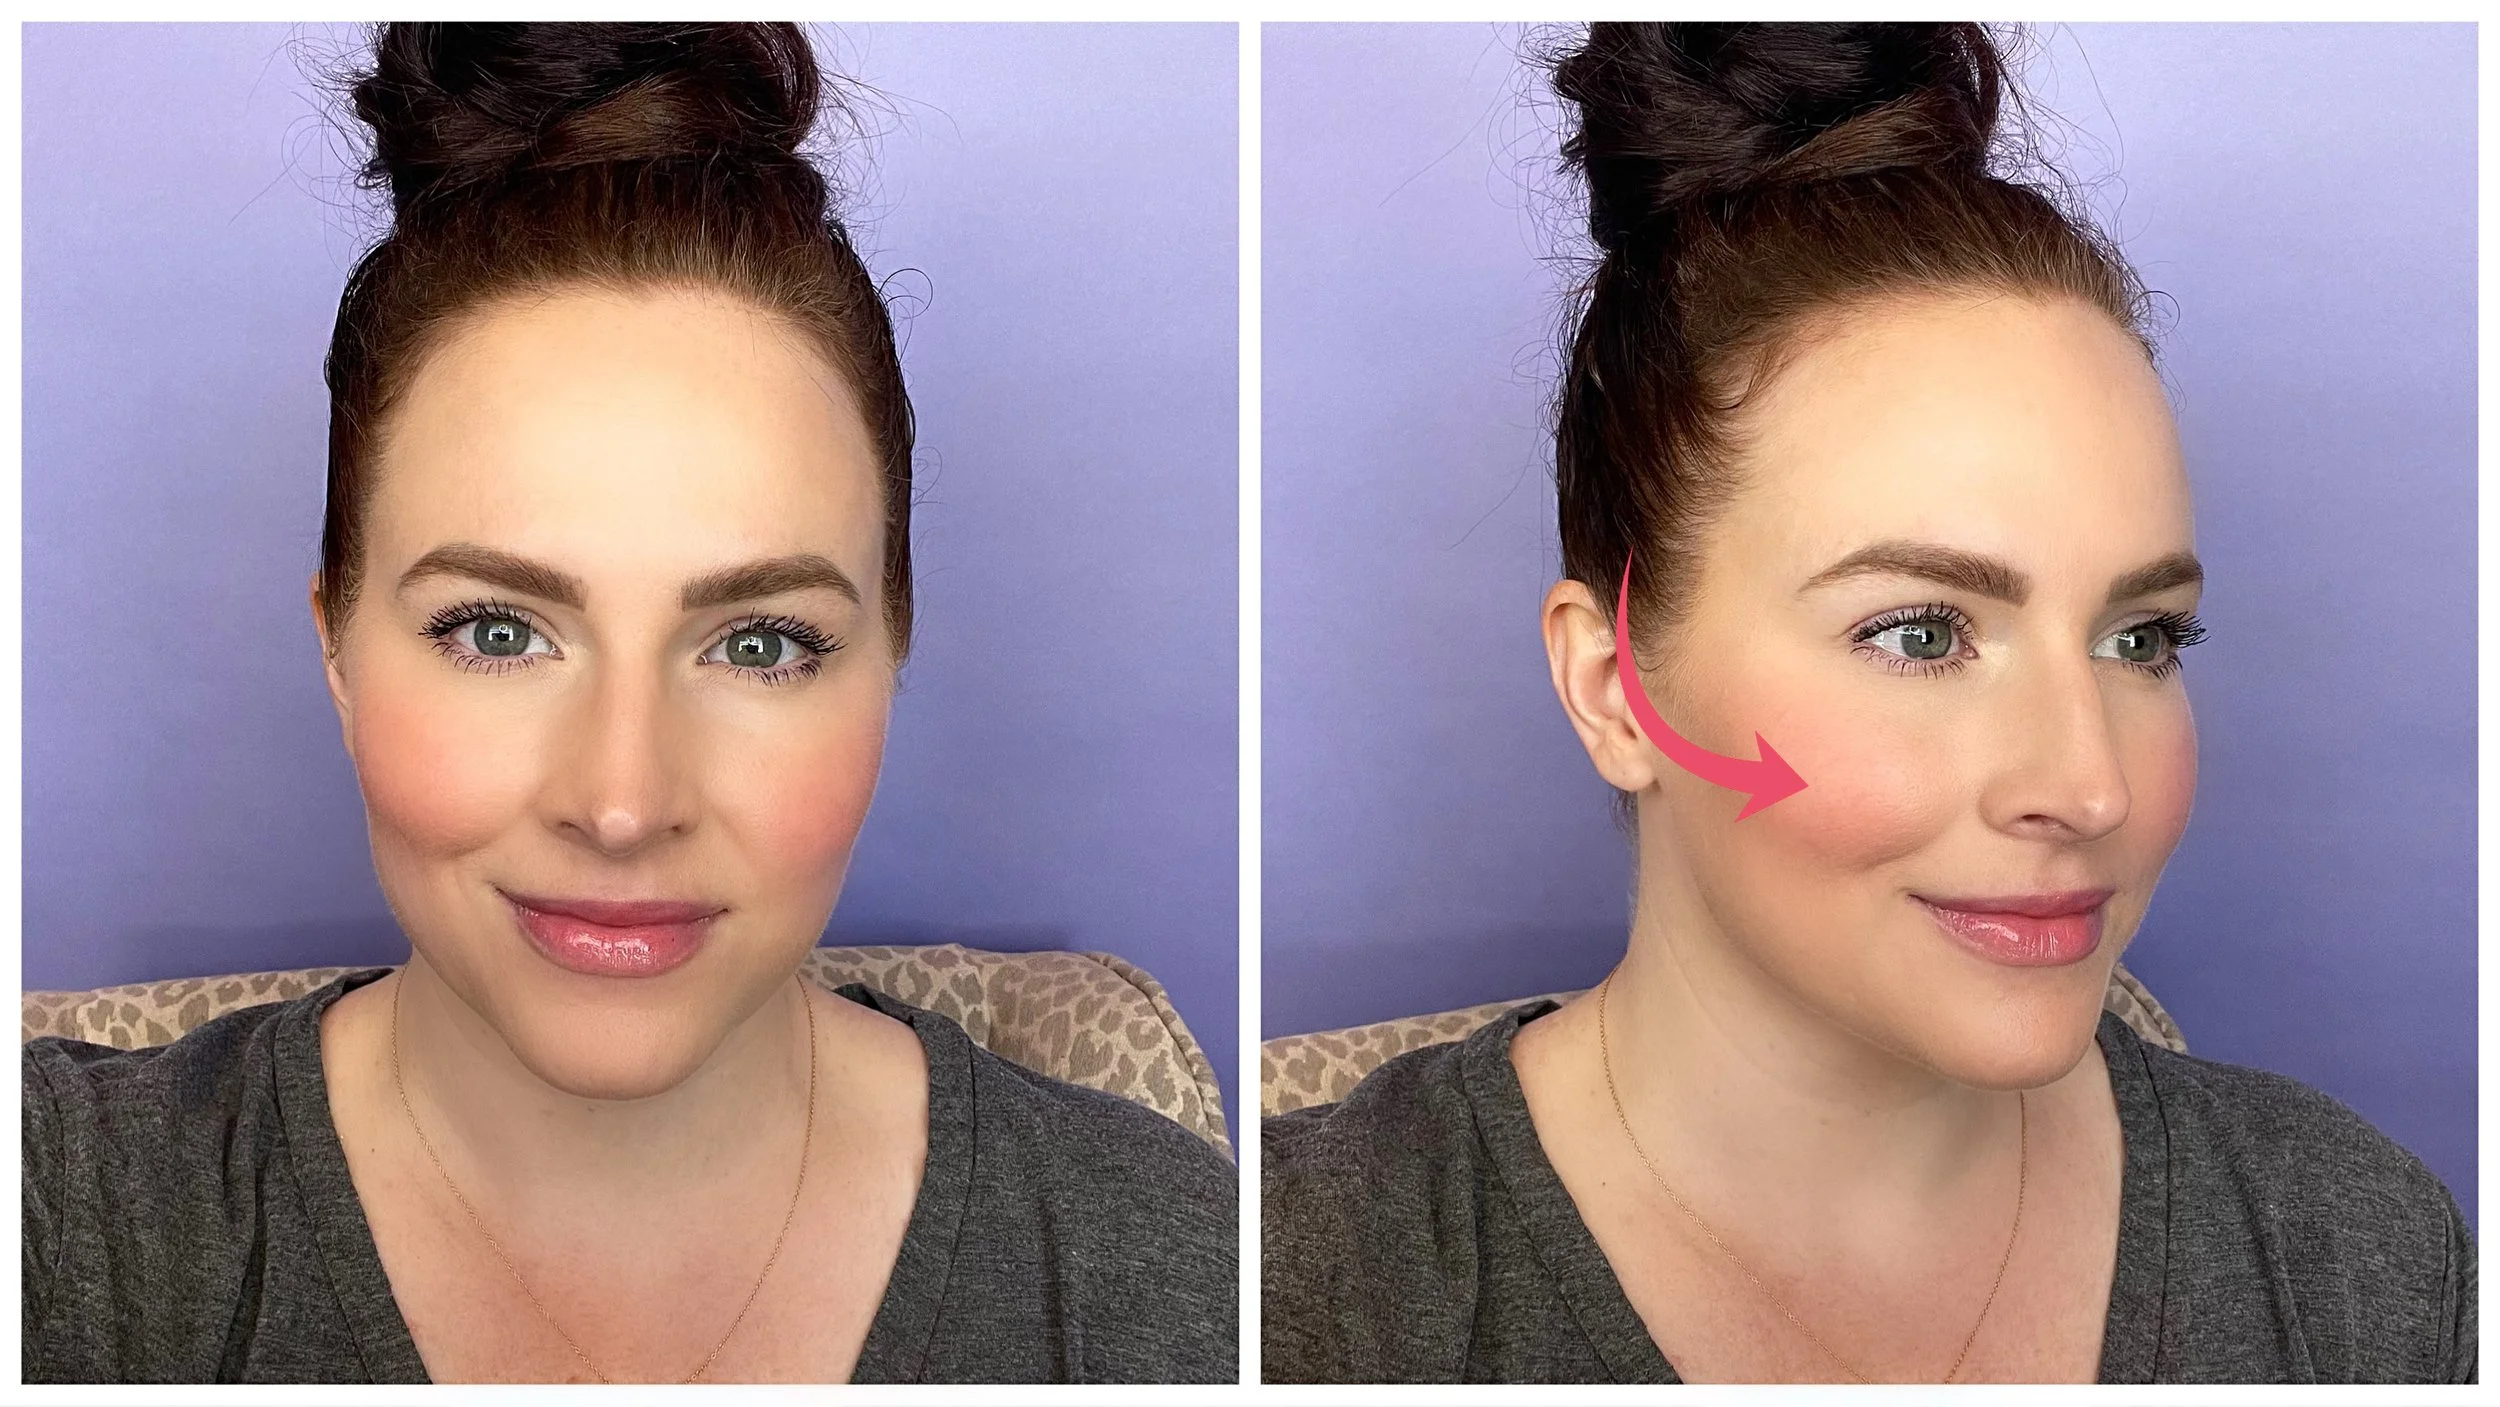
Apply blush slightly above the apples of the cheeks and blend diagonally toward the temples. Avoid circular application on the center of the cheeks, as it can make the face appear fuller.
A lifted diagonal placement helps elongate the face visually.
2. Oval Face
An oval face is naturally balanced, so blush placement is quite flexible. The aim is to maintain natural symmetry.
Apply blush on the apples of the cheeks and blend gently upward along the cheekbones. Avoid placing it too close to the nose or too low on the face.
A soft upward blend enhances natural bone structure without altering proportions.
3. Square Face
A square face has strong jawlines and a broad forehead. The goal is to soften angular features.
Apply blush on the apples of the cheeks and blend in a rounded motion toward the outer edges of the face. Focus slightly above the cheekbones to soften sharpness.
Avoid harsh horizontal lines, as they emphasize width.
4. Heart-Shaped Face
A heart-shaped face is wider at the forehead and tapers toward the chin. The goal is to balance the upper and lower face.
Apply blush slightly below the apples of the cheeks and blend outward toward the ears. This helps reduce forehead dominance and adds volume near the lower face.
Avoid bringing blush too high near the temples.
5. Long or Oblong Face
A long face has more vertical length than width. The goal is to create the illusion of width.
Apply blush horizontally on the apples of the cheeks and blend outward, not upward. This helps visually shorten the face.
Avoid dragging blush too high toward the temples, as it elongates the face further.
6. Diamond Face
A diamond face has wide cheekbones with a narrower forehead and jawline. The goal is to soften the widest point.
Apply blush slightly on the outer part of the cheekbones and blend upward toward the ears. Avoid placing blush directly on the center of the cheeks.
This technique balances the sharp cheekbone structure.
Blush Placement Guide Table
| Face Shape | Ideal Blush Placement Area | Blending Direction | Effect Created |
|---|---|---|---|
| Round | Above apples of cheeks | Diagonal toward temples | Slimming, lifting effect |
| Oval | Apples of cheeks | Slight upward blend | Natural enhancement |
| Square | Apples and slightly above cheekbones | Soft circular blend | Softens jawline |
| Heart | Lower apples of cheeks | Outward toward ears | Balances forehead |
| Long/Oblong | Center of cheeks | Horizontal outward blend | Shortens face visually |
| Diamond | Outer cheekbones | Upward toward ears | Reduces width emphasis |
Blush Application Techniques for Better Results
Even with correct placement, technique plays a major role in achieving a flawless finish.
Use a light hand when applying blush. Start with a small amount and build gradually. This prevents patchiness and over-application.
Blending is key. Harsh blush lines can ruin the overall look, so always diffuse the edges using a clean brush or sponge.
Cream blushes give a natural, skin-like finish, while powder blushes offer better control for beginners.
Common Mistakes in Blush Placement
One common mistake is applying blush too close to the nose. This can make the face look congested and unbalanced.
Another mistake is placing blush too low on the cheeks, which can create a droopy appearance.
Using the same blush placement for every face shape is also a frequent error. Each face shape requires a slightly different approach for best results.
Over-application is another issue. Too much blush can overpower the entire makeup look and make it appear unnatural.
Tips for a Natural Blush Look
Choose a blush shade that complements your skin tone. Peach and soft pink shades work well for most skin tones.
Always apply blush in natural lighting if possible. This ensures even blending and prevents over-application.
Layering cream blush under powder blush can increase longevity while maintaining a natural glow.
Using fingers for cream blush can also help warm up the product and blend it seamlessly into the skin.
Blush Placement for Lifted Look
If your goal is a lifted appearance, regardless of face shape, focus on applying blush higher on the cheekbones and blending toward the temples.
This technique creates a subtle contouring effect without using bronzer or heavy makeup products. It is especially useful for mature skin or when aiming for a fresh, youthful look.
FAQs
1. What is the most universal blush placement for all face shapes?
The safest universal placement is on the apples of the cheeks blended slightly upward toward the cheekbones.
2. Can blush replace contouring?
Blush cannot fully replace contouring, but strategic placement can mimic lifting and soft sculpting effects.
3. Where should I avoid applying blush?
Avoid placing blush too close to the nose, too low on the cheeks, or in harsh straight lines.
4. Which blush type is best for beginners?
Powder blush is easiest to control for beginners, while cream blush gives a more natural finish once blended properly.
5. How do I make blush last longer?
Layering cream blush with powder blush and setting it lightly with translucent powder helps increase longevity.
Conclusion
Understanding best blush placement for different face shapes is essential for achieving balanced and flattering makeup results. Instead of following a one-size-fits-all approach, adjusting placement based on facial structure enhances your natural beauty and creates a more polished appearance. With the right technique, even a simple blush application can transform your entire look